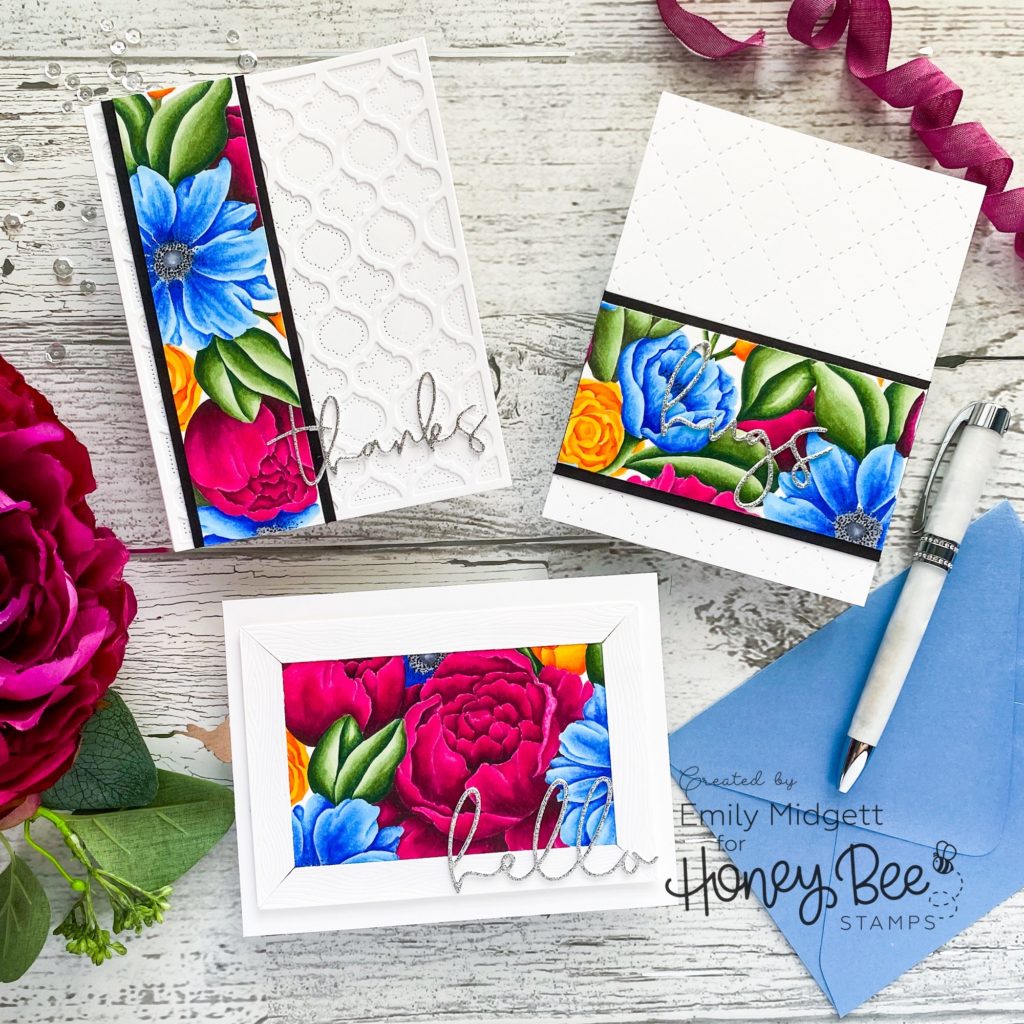
Hi there! Emily Midgett here with you today, and I am excited to share a trio of cards that I created using one full colored panel from my new Spring Blooms 6×6 background stamp! I’m not going to lie; some of the stamps that I illustrate are really exciting for me. I this this background stamp is one of my absolute favorite sets that I’ve illustrated. Those huge peonies and anemones are so much fun to color!
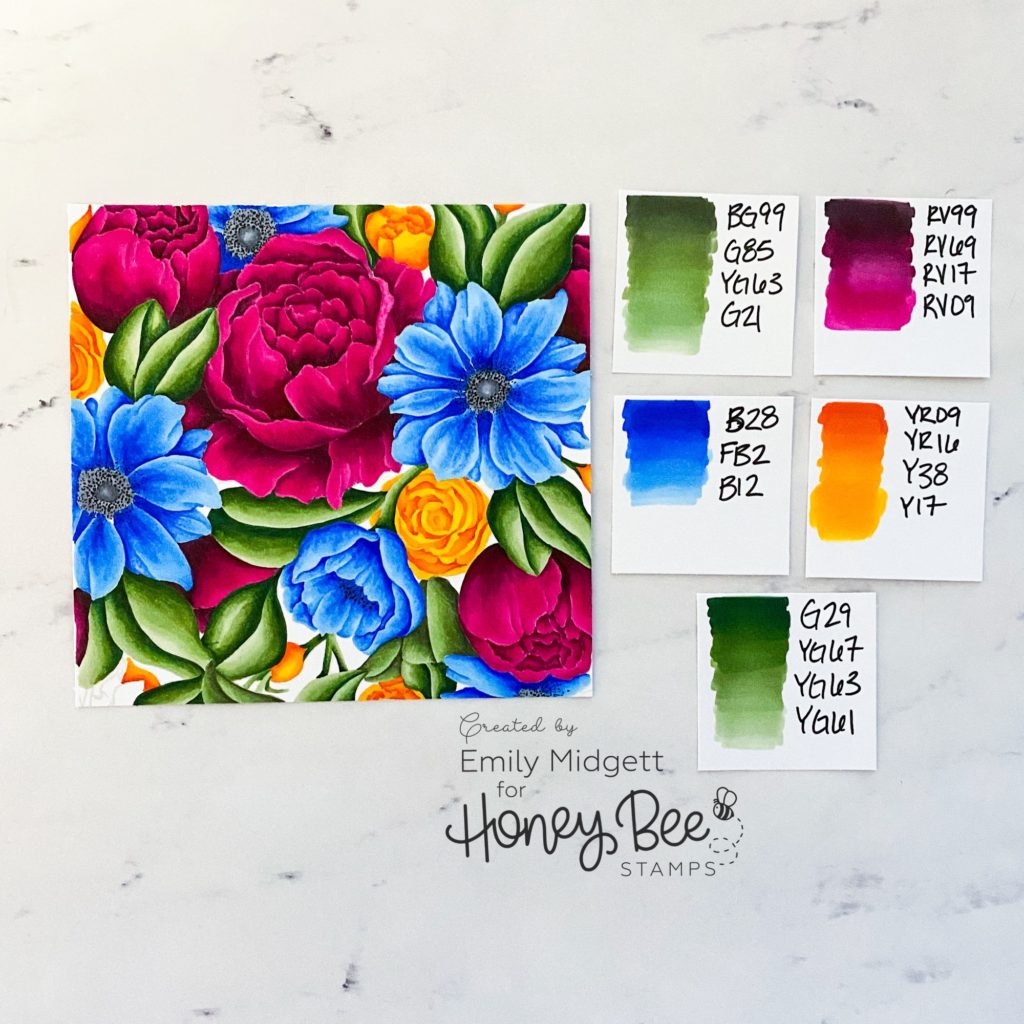
I began by stamping the Spring Blooms 6×6 background stamp onto a 6×6 panel of Copic-friendly white cardstock using no-line coloring ink. I colored the entire background using Copic markers (I’ve shown the combos below), with an interesting combination of deep, raspberry pink, bright blue, and golden orange. I saw a photo on Pinterest of a bridal bouquet with these colors (it actually was the bouquet that inspired the illustration to start with), and I couldn’t wait to color it using the same colors!
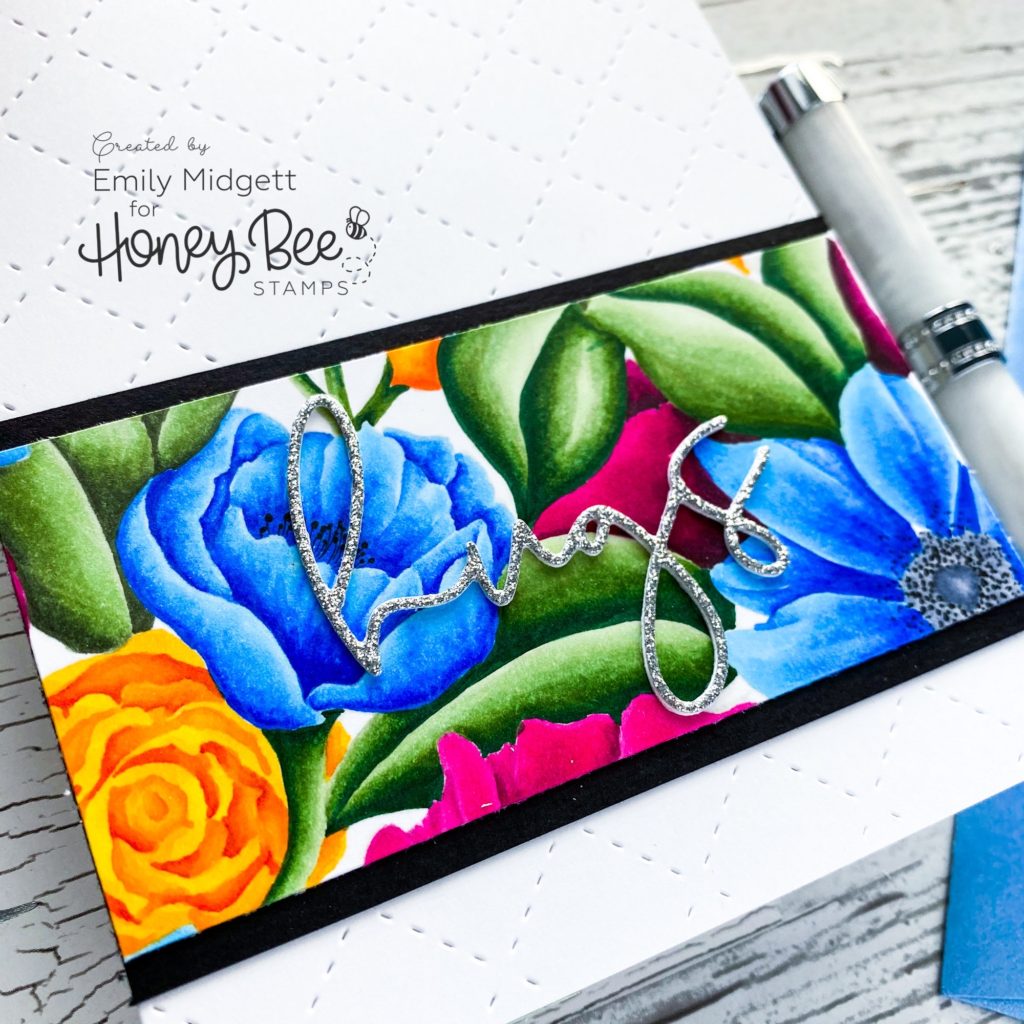
After I’d colored the entire image (I won’t tell you how long it took), I wanted to maximize the entire image by creating as many cards as I could from it. So, I cut it into three panels to create three cards with it. For the first card, I used a long, rectangular panel and backed it with a slightly wider piece of black cardstock to create a mat.
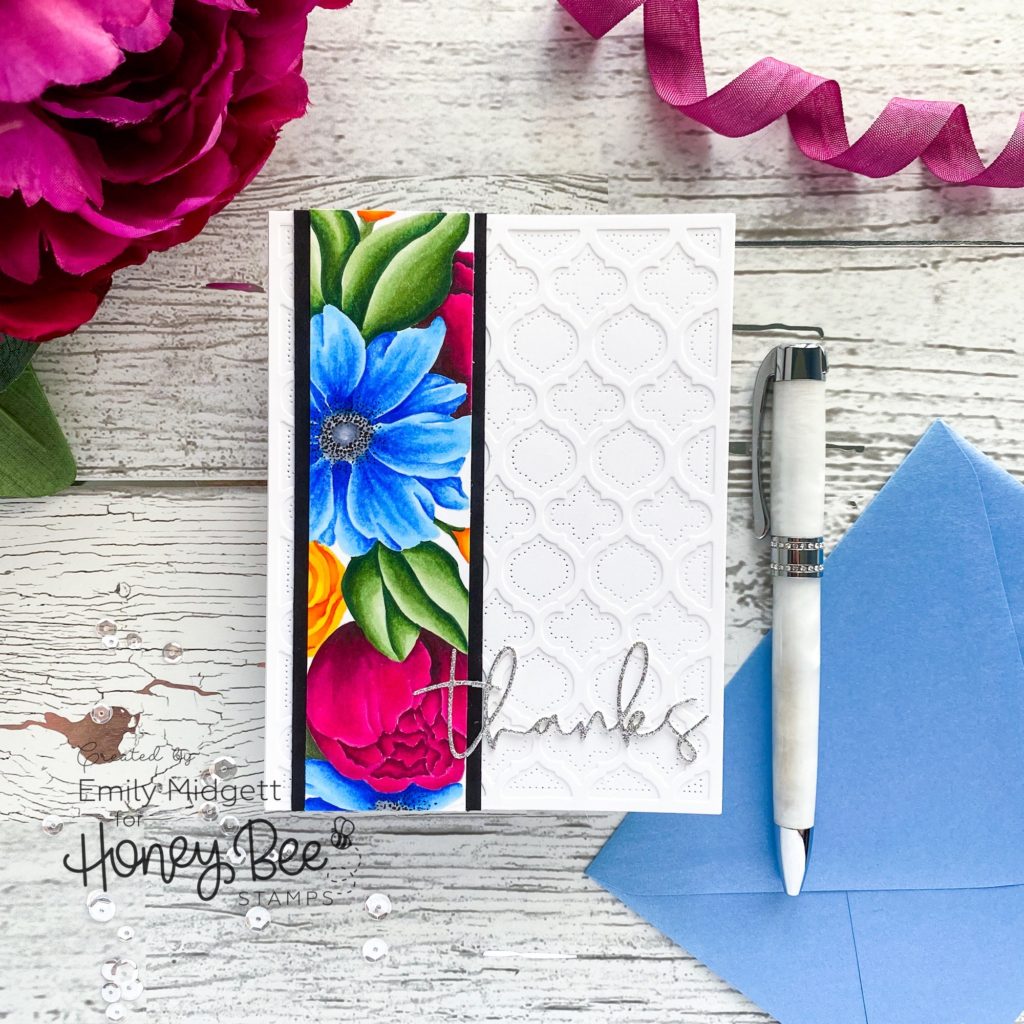
For the first card, I used a long, rectangular panel and backed it with a slightly wider piece of black cardstock to create a mat.
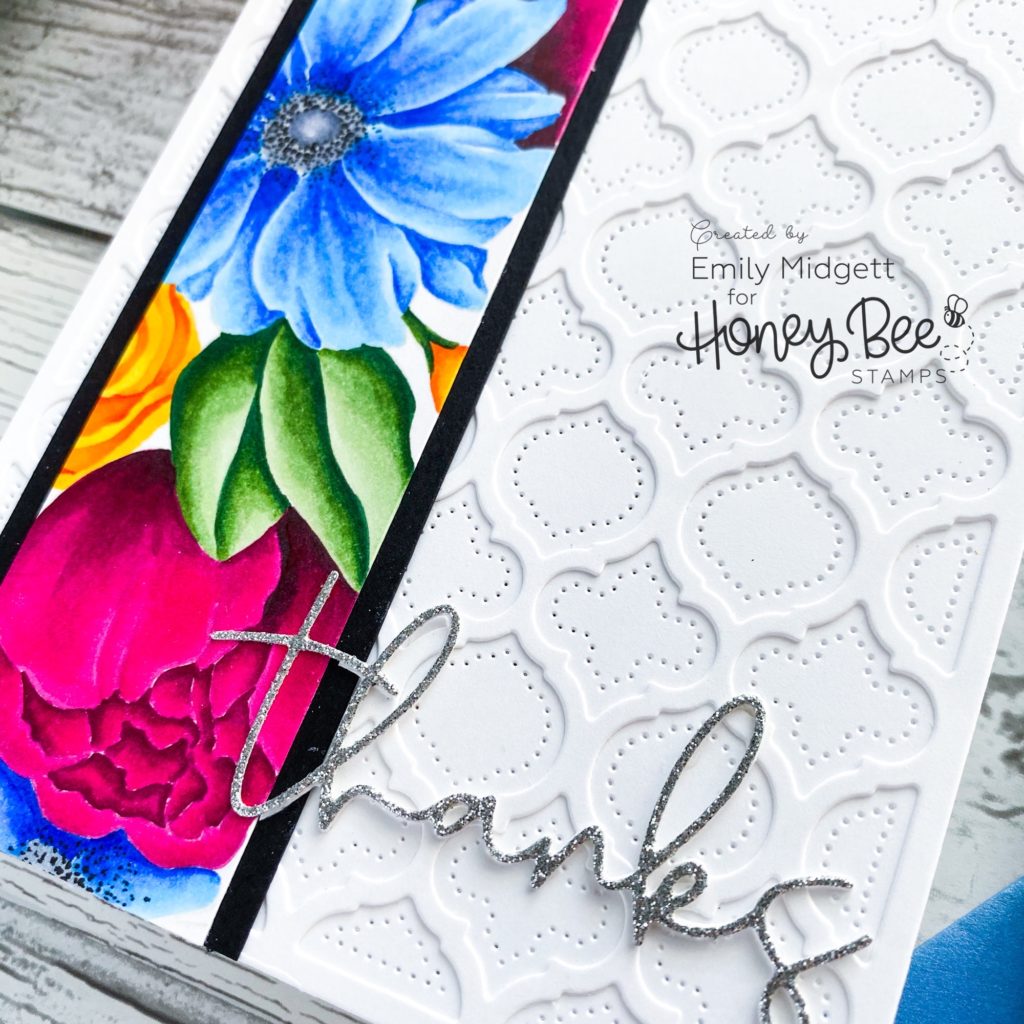
For the card base, I created a super textured, white-on-white background using the Quatrefoil Cover Plate bundle. I mounted the floral strip using liquid adhesive, orienting it to one side, then added a die cut greeting cut from some silver glitter cardstock using the Slimline Sentiments: Eyelet die set.

My second card uses another strip of the Spring Blooms 6×6 background panel, this time across the bottom portion of a vertical A2 card front. I again backed the colored panel with some black cardstock.
I mounted the matted Copic-colored panel on another textured white background panel, this one cut using the Quilted Cover Plate die. Another simple, silver glitter sentiment from Slimline Sentiments: Eyelet die set finished it off.

The final piece of the Spring Blooms panel featured that huge peony as the star. I wanted to let it be the main character on the card, so I used the new Wood Frame Builder dies to create a white frame around the edge.
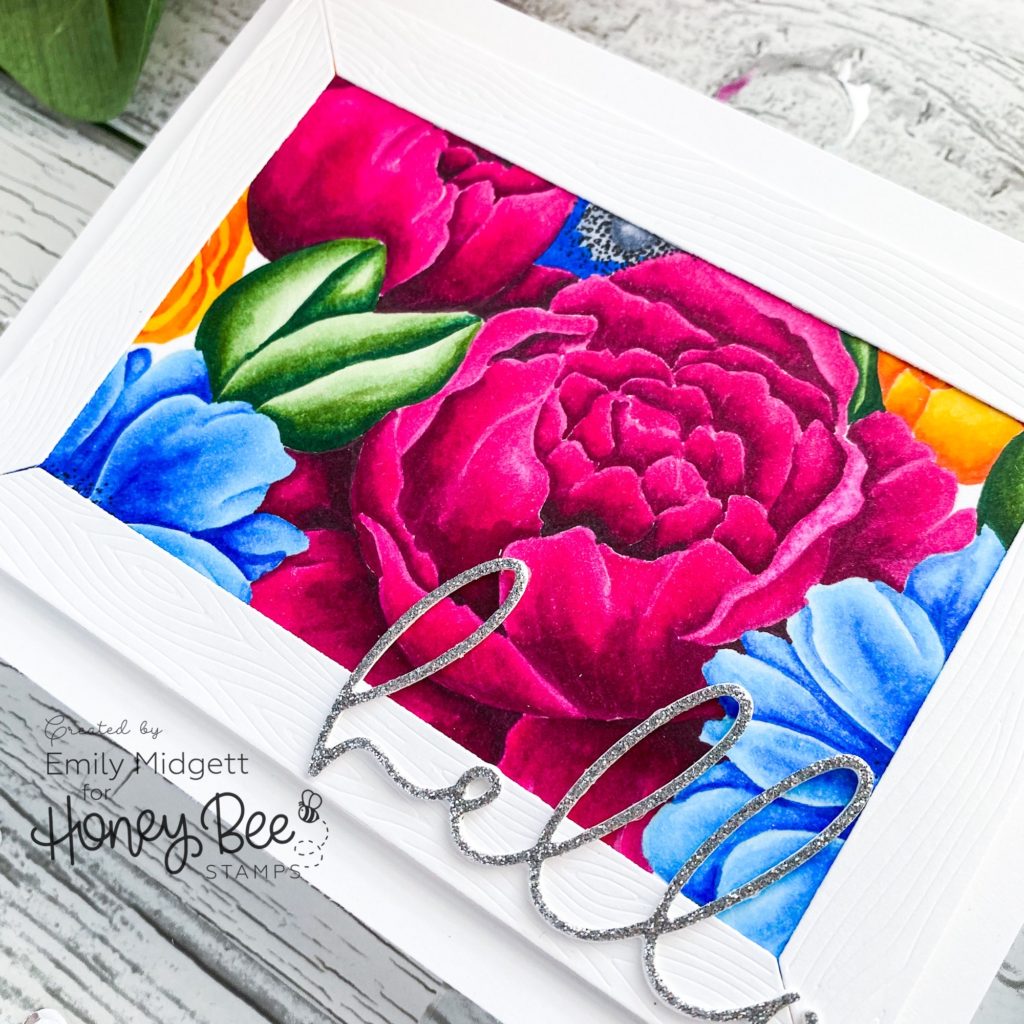
After adhering the framed panel to a white card base (using the white-on-white allows the super colorful floral panel to pop really well), I added another dimensional die cut from the Slimline Sentiments: Eyelet.
Simple, but so colorful and eye-catching! When you spend that much time coloring a background, you need to make as many cards as you can from it, right?
Well, that’s all for me today! Thanks so much for stopping by, and have a marvelous day!
6 responses to “One background, three cards!”
I love this stamp and these cards are absolutely stunning! Thanks for sharing the colors you used to color them.
These cards are beautiful. The colors are so vibrant. I really like the stamp you used. Beautiful!
Beautiful dies to accent the cards with these gorgeous floral panels! Awesome cards!
That is absolutely beautiful. But I really do want to know how long it took you to color????! I am a beginner with alcohol inks and appreciate knowing that it takes time even when you master them.
Great idea to spread the beauty and time across 3 cards.
These cards are stunning! Such an inspiration!
Gorgeous cards! The coloring is amazing.