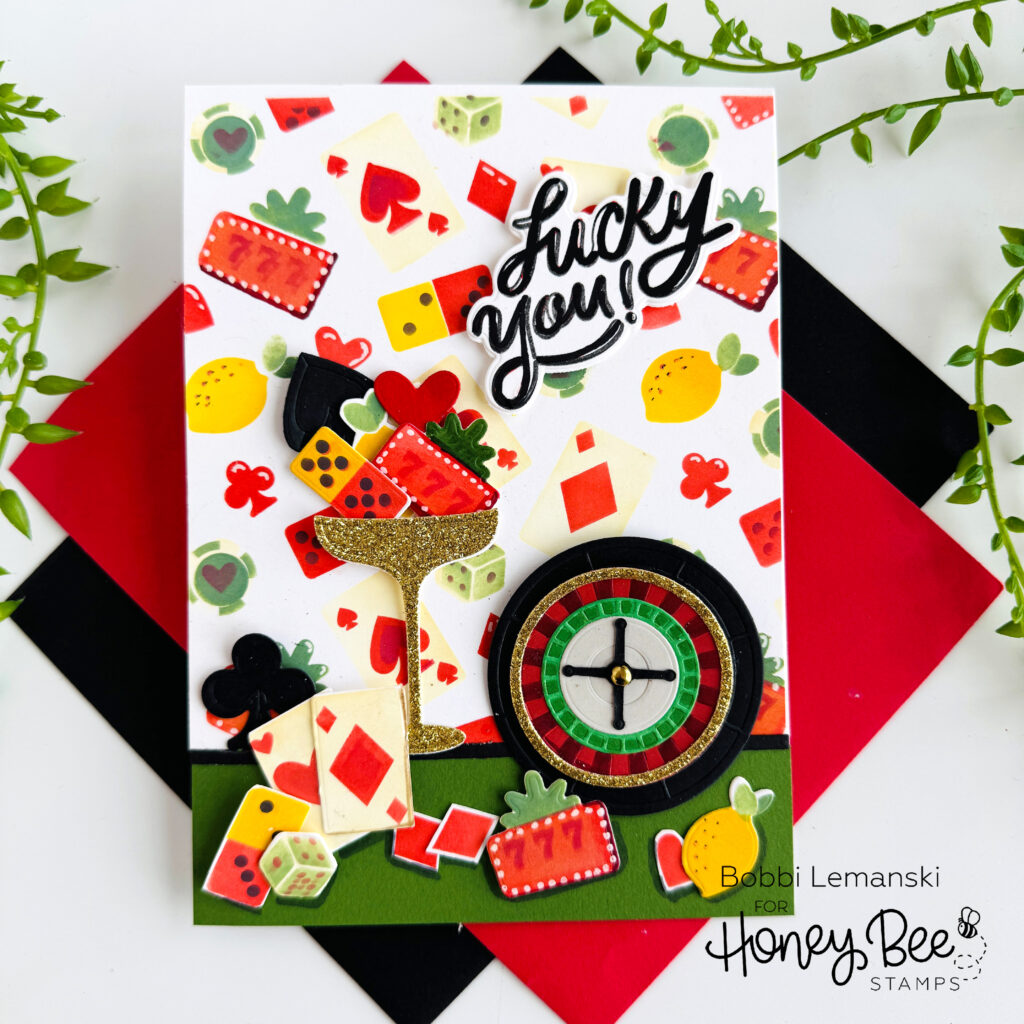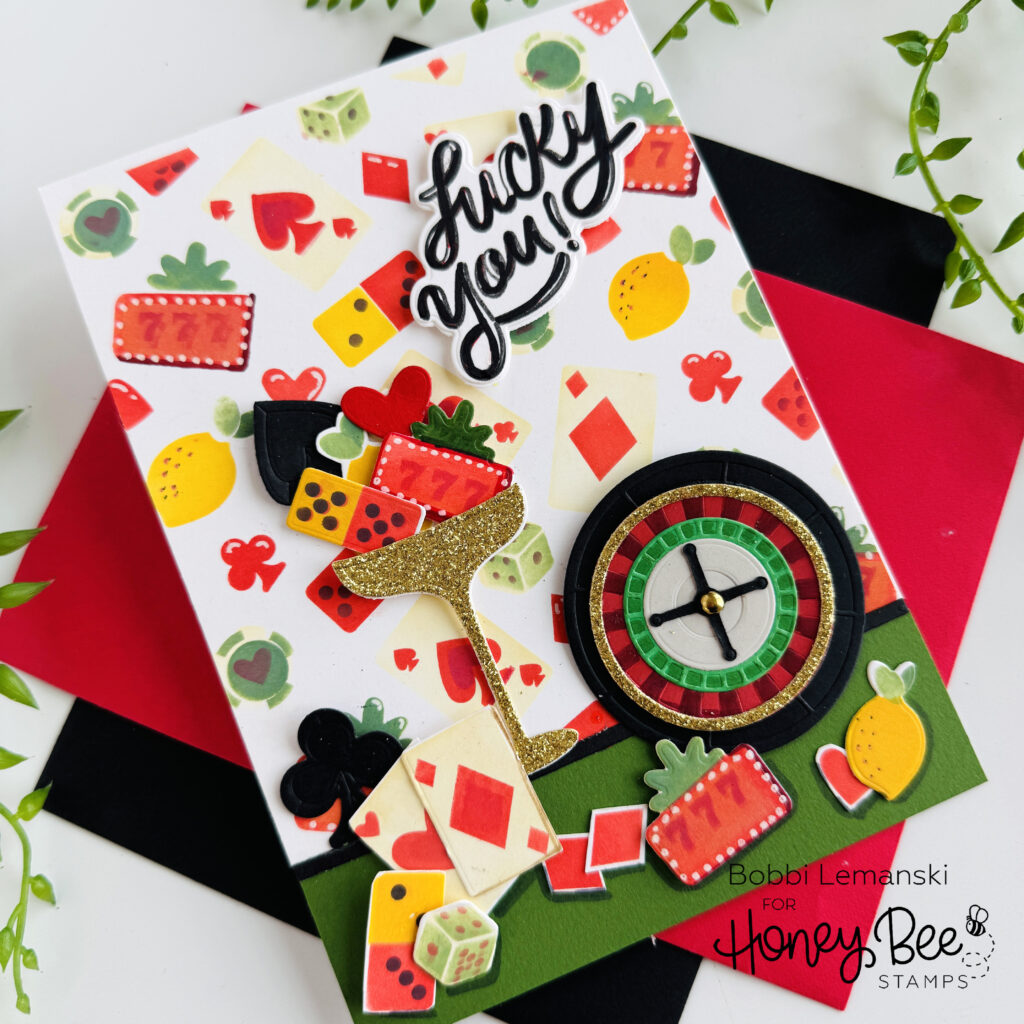
Hi there, Honey Bee friends! It’s Bobbi Lemanski throwing some luck your way! I have this 5″ X 7″ card that screams Vegas with its roulette wheel, poker cards, jukebox fruit and a glittery gold drink glass! This card could be used for so many events including congrats events, birthday parties and more! I’m using the following Honey Bee Stamps products from the Perfect Match release:
Lovely Layers: Roll the Dice Honey Cuts dies
Jackpot 6″X6″ Coordinating Stencil and coordinating Honey Cuts dies
Royal Flush stamp set and coordinating Honey Cuts dies
Lovely Layers: Playing Cards Honey Cuts dies
For the basics… my featured project below is made from Neenah 80lb Solar White cardstock for the card base and card front panel. All of the black ink stamping was done using Honey Bee’s Bee Creative Intense Black Ink. I use Honey Bee Stamps Bee Creative Precision Glue and for when I want more dimension, Bee Creative Foam Dots With Tab for adhering my elements together. My blender brushes (large and small) are a must for ink blending color on the background, too. For white highlights, I use my white Gelly Roll pen. My card is 5″ X 7″ in size.

To create this 5″ X 7″ card, I used the Jackpot 6″X6″ Coordinating Stencil and coordinating Honey Cuts dies to create the card front’s background. I stenciled two 5″ X 6″ pieces so that I could use one as the backdrop and one to cut out the items from the design. I added a 1-1/4″ strip of green cardstock with a 1/8″ transition strip of black at the top of the green strip to mimic a poker table. This gives my casino items including the drink, a place to rest on the card.
I used the second stenciled design and the coordinating Honey Cuts dies to cut out the dice, cards, lemon, and other items from the design. Using the Lovely Layers: Playing Cards Honey Cuts dies, I cut a large solid black club, spade and a red heart shape to add to the collage. I also used the Lovely Layers: Roll the Dice Honey Cuts dies to cut out a gold glittered drink glass and the parts of the roulette wheel. I assembled the wheel using the assembly instructions provided, filled up the glass with all the fun little die cuts and added them to the card front. I used a Creative Foam Dots With Tab to attach the drink and inside elements. The roulette wheel was attached using a brad. See below.

For an interactive element, I attached the roulette wheel using a homemade paper washer (Note: The paper washer was created by cutting a 1/2″ circle and punching a hole in the middle) between the gold and black layers and adding a brad. This allows the roulette wheel to spin using your hand for an interactive feature on the card! How fun is that?! The brad holds all the wheel layers in place and is connected to the back of the card front and then the card front was attached to the card base to conceal the back of the brad.
Lastly, I stamped and attached the “Lucky you” sentiment to the front using Creative Foam Dots With Tab to make it stand out a bit from the background. The card front was attached to a white card base made from Neenah 80lb Solar White cardstock.
You can shop the entire Honey Bee Stamps , Perfect Match release here If you decide to place an order, please use the links in this post so that Honey Bee knows which ideas inspired you!
Thanks for stopping by today. If you want to see more ideas and inspiration from me, subscribe to my blog, BobbiHartDesign.com. I’ll send you updates on new posts! You can also find me on Instagram as @BobbiHartDesign and on Facebook as BobbiHartDesign.
