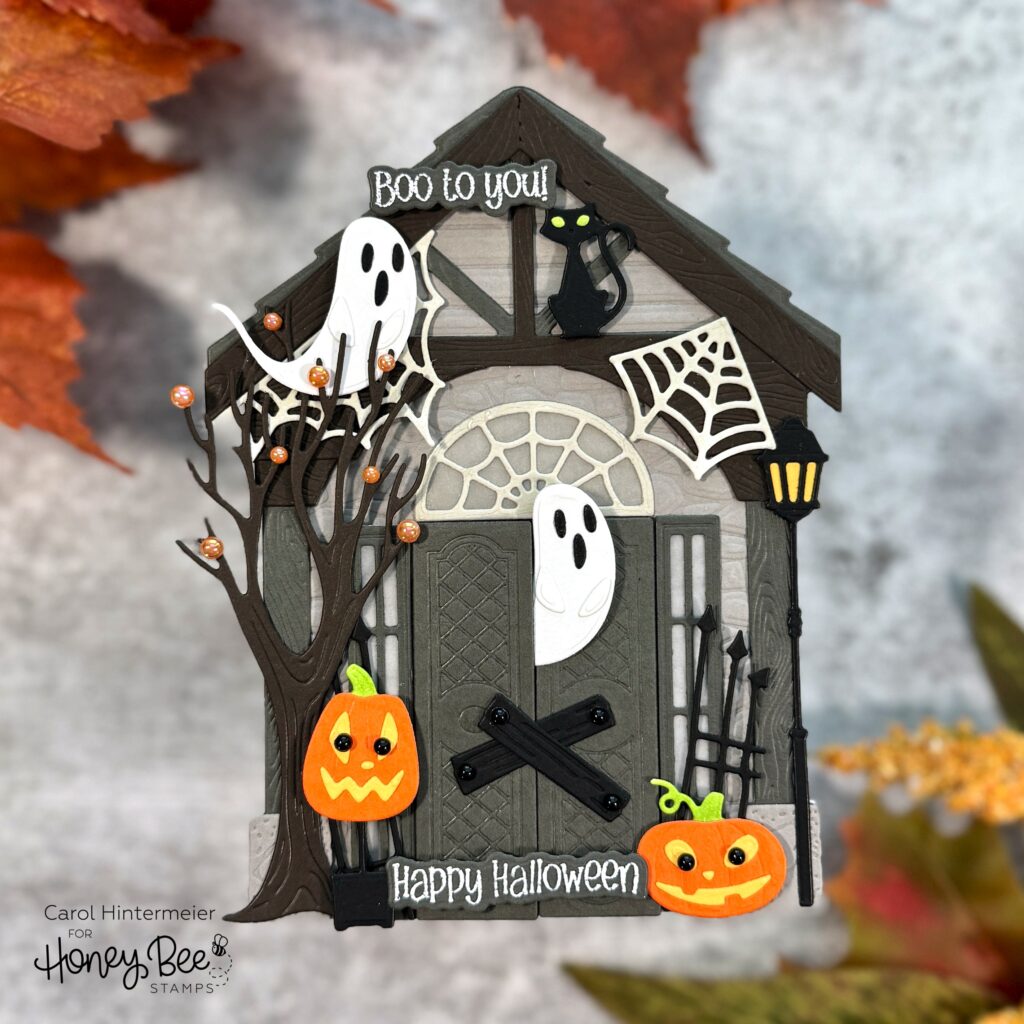
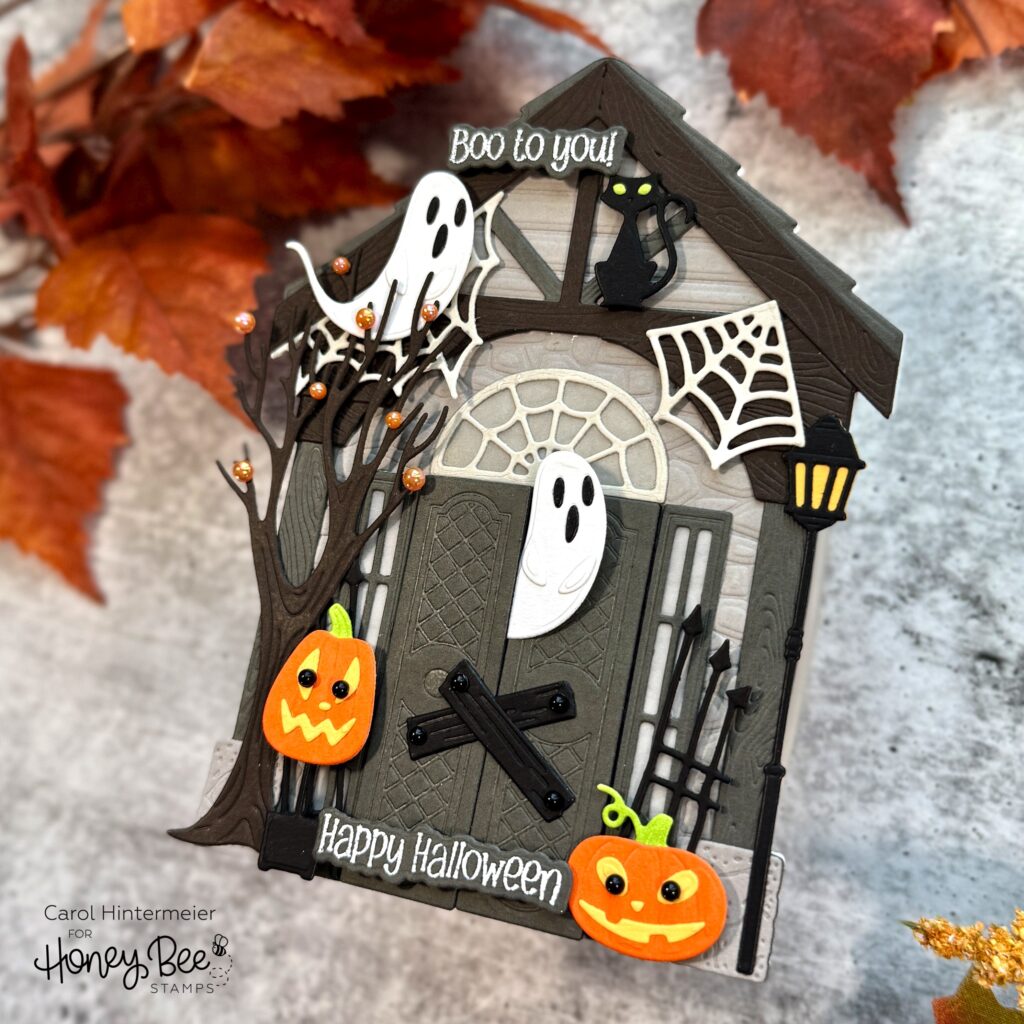
Hello Honey Bee friends! Today I’m sharing my cute Halloween card that features the Lovely Layers: Front Porch Falloween Add-on Honey Cuts! This pairs with the previously released Lovely Layers: Front Porch dies.
Before I begin how I made this card, I wonder if you, like me, feel overwhelmed with a lot of dies to layer as in the Lovely Layers: Front Porch Falloween Add-on? I found a way to break it down to make it so much easier! I printed off the Layering Guide that is available to download that is found in the product description.
Then I looked at the first section of the Layering Guide and just focused on the layers for the door, as shown. I just continued through the guide and the pieces were assembled in no time! I used two shades of gray cardstock, and black, white, orange, brown, and yellow cardstocks to die cut the elements in the Front Porch and the Front Porch Falloween Add-on sets.
The cat’s eyes and the pumpkin stems are white cardstock that I colored with a YG25 Copic marker.
Using my reverse tweezers and pick-up tool made it easy to glue the layers together.
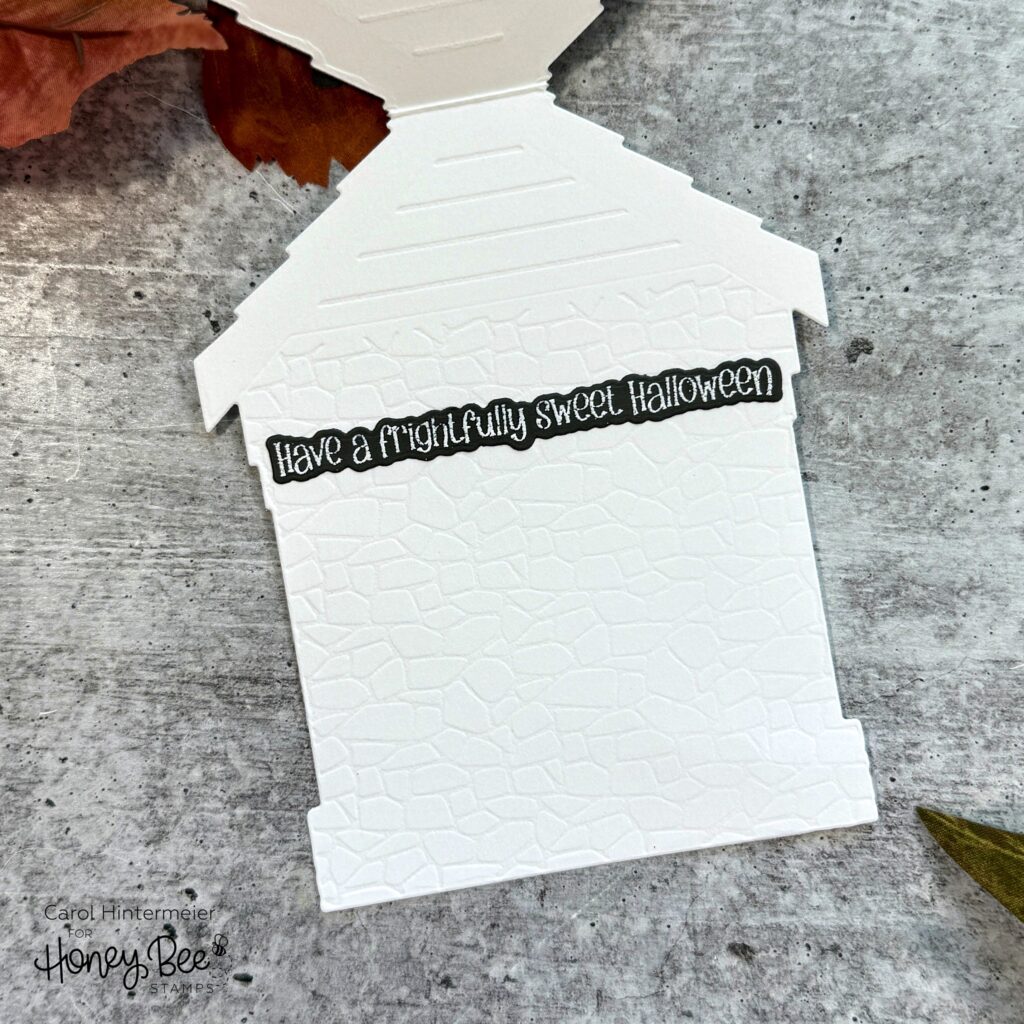
For the card base, I took a folded A2 card and placed the large die from the Front Porch dies with the folded edge of the card just below the top of the die. I ran that through my die cutting machine to create the shaped card base.
Then it was just a matter of arranging and gluing the elements to the base.
I stamped three sentiments from the Sweet Halloween stamp set with clear embossing ink onto more of the dark gray cardstock. I added white embossing powder and then set it with my heat tool. I cut the sentiments out with the coordinating dies.
I glued one sentiment inside the card.
I adhered the other two sentiments to the front of the card with foam strips.
Then I added Sweet and Spooky pearl stickers to the tree, pumpkins, and door. Did you notice how one of the pumpkins is on the planter? Haha!

I appreciate you stopping by for a look! Have a wonderful and crafty week!