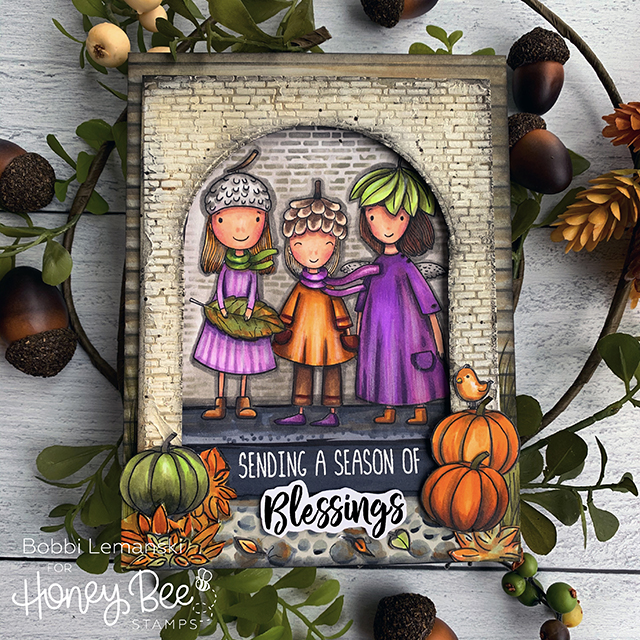
Hi everyone! It’s Bobbi from BobbiHartDesign.com. I’m sharing a fall-themed, textural card today using the Acorn Sisters stamp set and some NEW background stencils by Honey Bee Stamps. While this set is not new to Honey Bee, it is new to me. I saw this cute image and just had to have it. Plus, I’m just loving these new background stencils from the Season to Sparkle Holiday release. To make this card, I used the following Honey Bee products (click to see each product):
- – Acorn Sisters stamp set
- – Salvaged Brick Background Stencil
- – Shiplap Siding Background Stencil
- – River Rock Background Stencil
- – Neenah 80lb. Classic Crest Solar White cardstock
- – Detail Blender Brushes
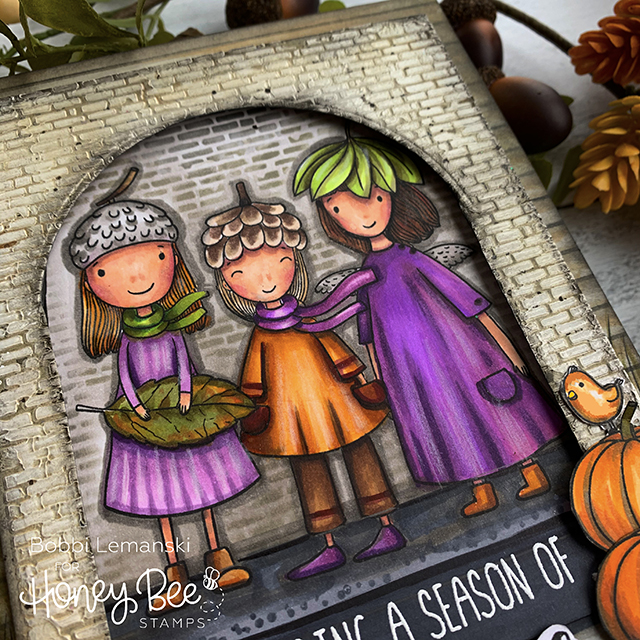
To create this 5″ X 7″ portrait-oriented card, I started by stamping and coloring the Acorn Sisters using my Copic Sketch Markers on a 4-1/2″ wide X 4-3/4″ piece of white cardstock. I colored the entire area behind the image in gray using Copic W5 and W3 markers.
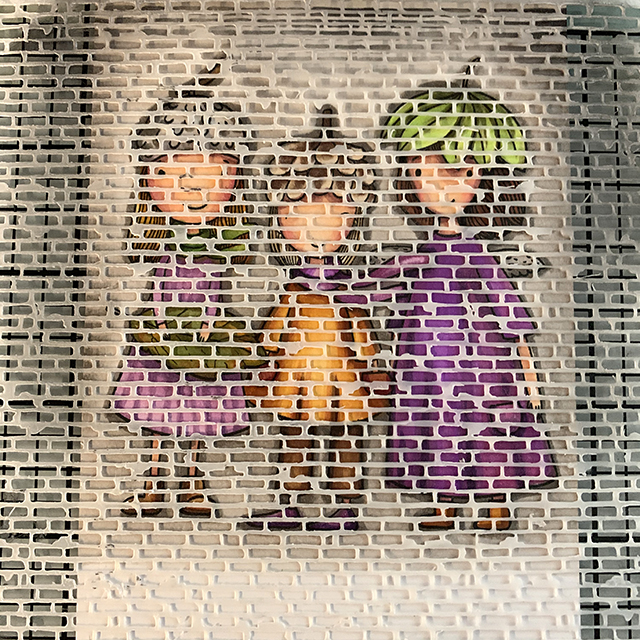
I stenciled brick behind the trio by layering the Salvaged Brick Stencil over the image and coloring only the bricks that fall within the background areas.
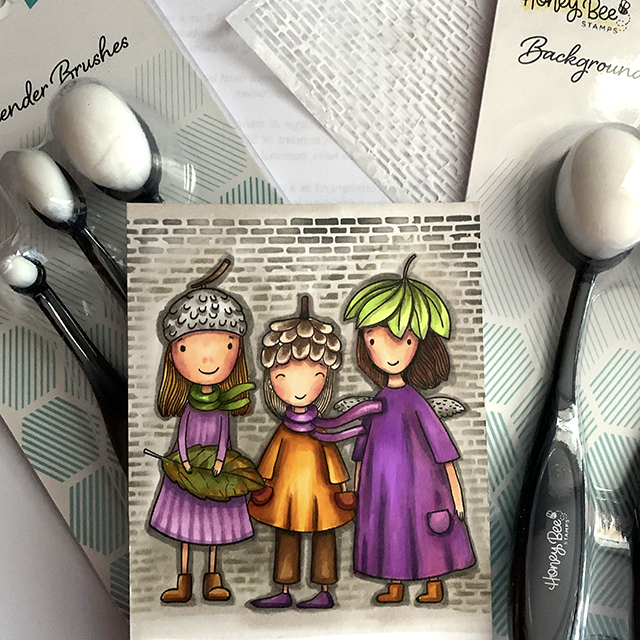
The various sizes of the blender brushes really helps – especially getting in those smaller areas on the background. The best part is there is no masking required to do this step!
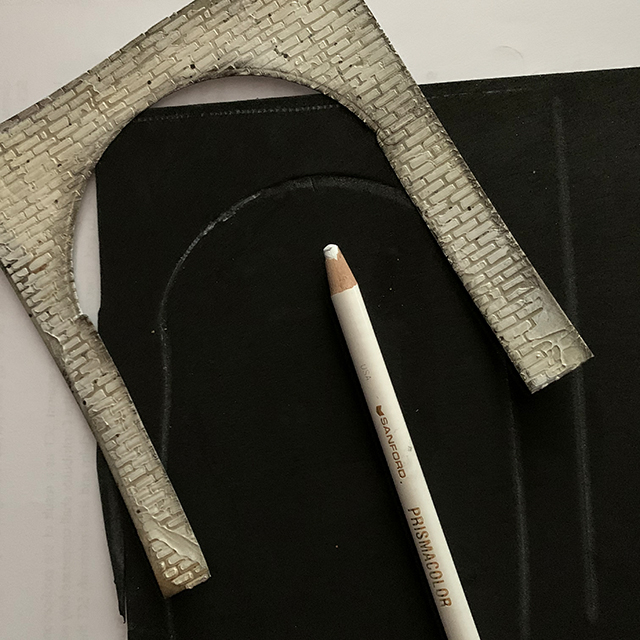
To create the brick archway, I applied a layer of Textured Embossing Paste over the stencil that was layered on a 5″ X 6″ piece of warm gray cardstock. I used a circle die in my cutting machine, carefully positioning my cutting plates so that the machine would only cut half of the die shape for a semi-circle. To finish the arched opening, I cut in a straight line, up both sides to the start of the semi-circle. I added Ranger Distressed inks in Straw, Black Soot and Hickory Smoke over the top and edges of the textural brick to “messy and age” the entry. I added black craft foam to the back of the arch to create dimension around the sisters. To do this, I used a colored pencil to trace the design and then I fussy cut it out, cutting just inside the lines so that the foam is smaller than the cardstock design.

Next, I used the Shiplap Siding Stencil to create the background building that is layered behind the arch entry. I used the same distressed inks on this piece as the arch as well as some shading of the siding lines using Copic W3 marker.
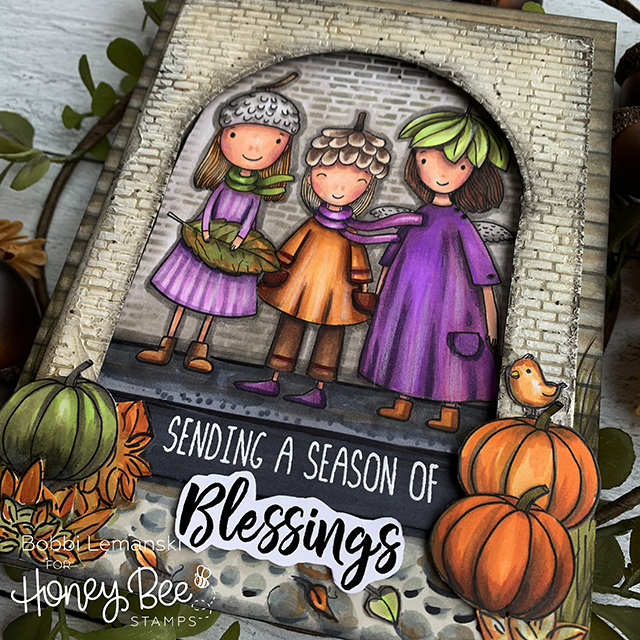
I added a “stoop” using cool grey shades to separate and complement the warm brick walls. The phrase was embossed in white over the stoop riser. The shiplap background, arched entry and the sisters image were all assembled together, layering and adhering them on top of each other as shown.
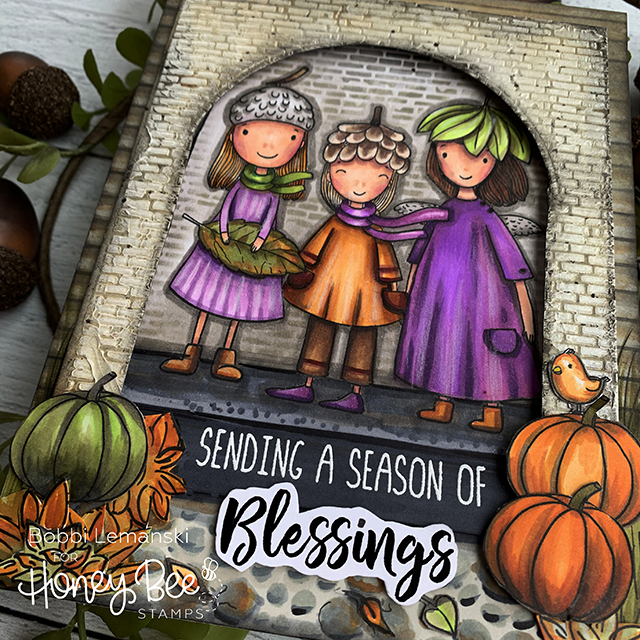
Next, I used the River Rock Background Stencil to create a walkway leading up to the stoop and arch. I used my blending brushes to apply Hickory Smoke to the warm gray cardstock. Later, I added more dimension by layering more colors over each rock and applying some simple shading, too.
Every home needs some fall decorations on the stoop and walkway. I added three pumpkins and colorful leaves to the card front. I also stamped “Blessings” on white cardstock, fussy cut around the letters and attached right below the stoop with some dimensional foam tape to complete the phrase and card.
I hope this card finds you in a happy, fall state-of-mind! Thanks for stopping by today. You can find me everyday on my blog at BobbiHartDesign.com, Instagram as @BobbiHartDesign and on Facebook as BobbiHartDesign.
Bobbi Hartmann Lemanski, Bobbi Hart♥ Design, Adding h♥art into every design
8 responses to “Blessings from the Acorn Sisters”
Beautiful and very creative. Thanks for sharing.
Thank you Kimberly. I’m so glad you stopped and visited with me today! Have a great Sunday! Bobbi
I found this very interesting, Bobbi! Do you suppose if you cut a mask for the girls you could have laid the stencil over them and not been to concerned that ink would get on them. I’m afraid with my old eyes I would ruin the colored girls if I just laid the stencil on them and went around them (even with the smallest of brushes). If I understood you correctly that’s what you did – yes?
There’s a lot of work on this card, and it’s definitely for the more advanced stamper. It’s a beautiful piece of work, and I’ve loved reading your blog piece. You’re an amazing crafter, Bobbi!
Hi Susie! Thanks for visiting. Yes, a mask would be ideal to make sure you don’t get any ink on the girls. I’m always in a hurry and I found that I have much better precision now with the blender brushes since they come in all sizes. On this particular project, I was okay with it being imperfect – not inked all the way to the edges of the image, etc. I like the sort of in/out, imperfect looks of the background to fit with the style of the salvaged brick. However, if you strive for perfection and want it to be fail-proof, you are absolutely correct in that a mask would be the best option! I’m always looking for the quicker approach. At a minimum, I would recommend applying the distressed ink first and then coloring the image so if you mess up, the time spent coloring is not lost! Thanks for commenting, Susie! You are the amazing artist and I always love seeing your works. Have a great day. Bobbi 🙂
What a sweet card! This post made me smile this morning! 🙂
Thank you!
Oh, I’m so glad! I was drawn to these lovely ladies, too. I did the same when I saw this stamp set and knew I had to create a card with them as the focal point! Thanks for visiting and sharing. Have a wonderful day! Bobbi
I think this is very beautiful!! The details are incredible. I love the stencils you used!! The little girls are so adorable. I just love this!!
Thank you, Lisa! I’m so happy you like it. It was fun to make because these girls just make me smile the whole time I’m coloring them. The new stencils are fantastic and I couldn’t wait to use them, too. They all worked well together to make this card. 🙂 Have a great week! Bobbi