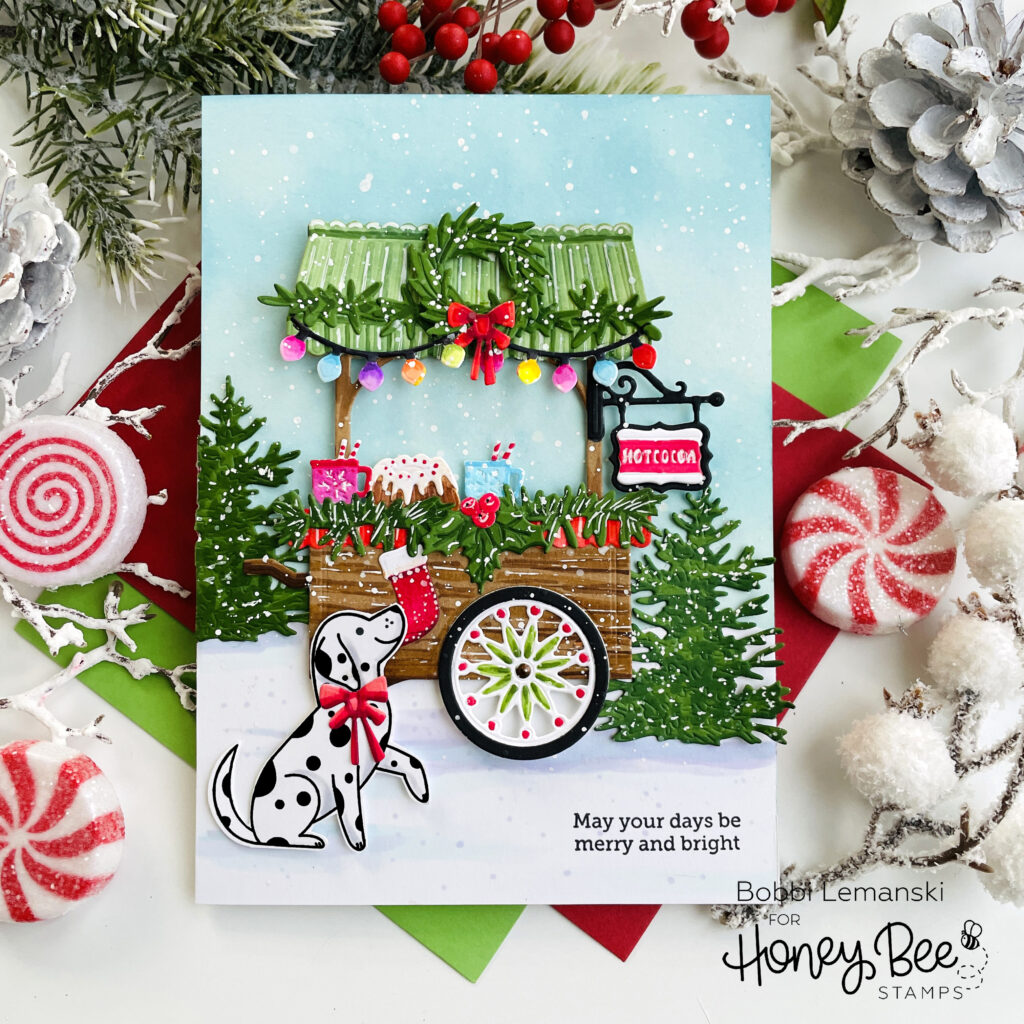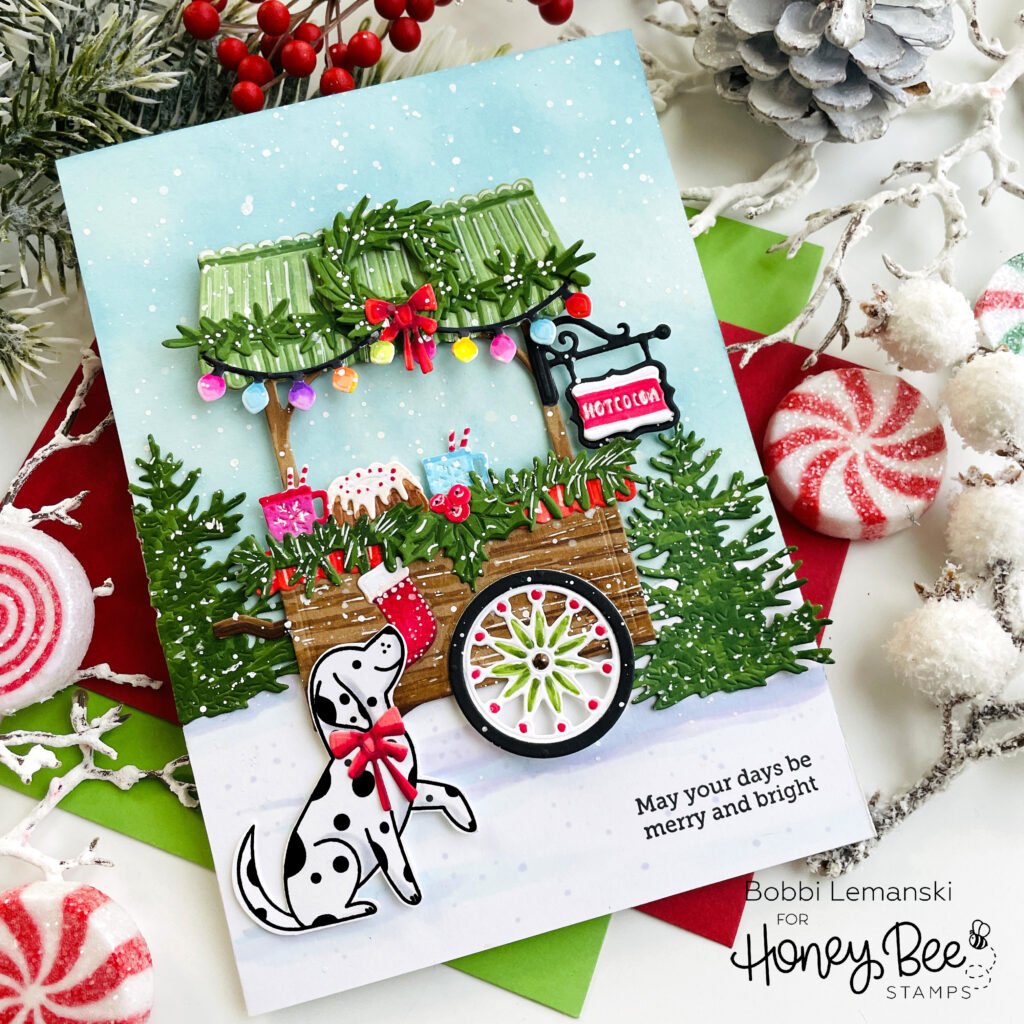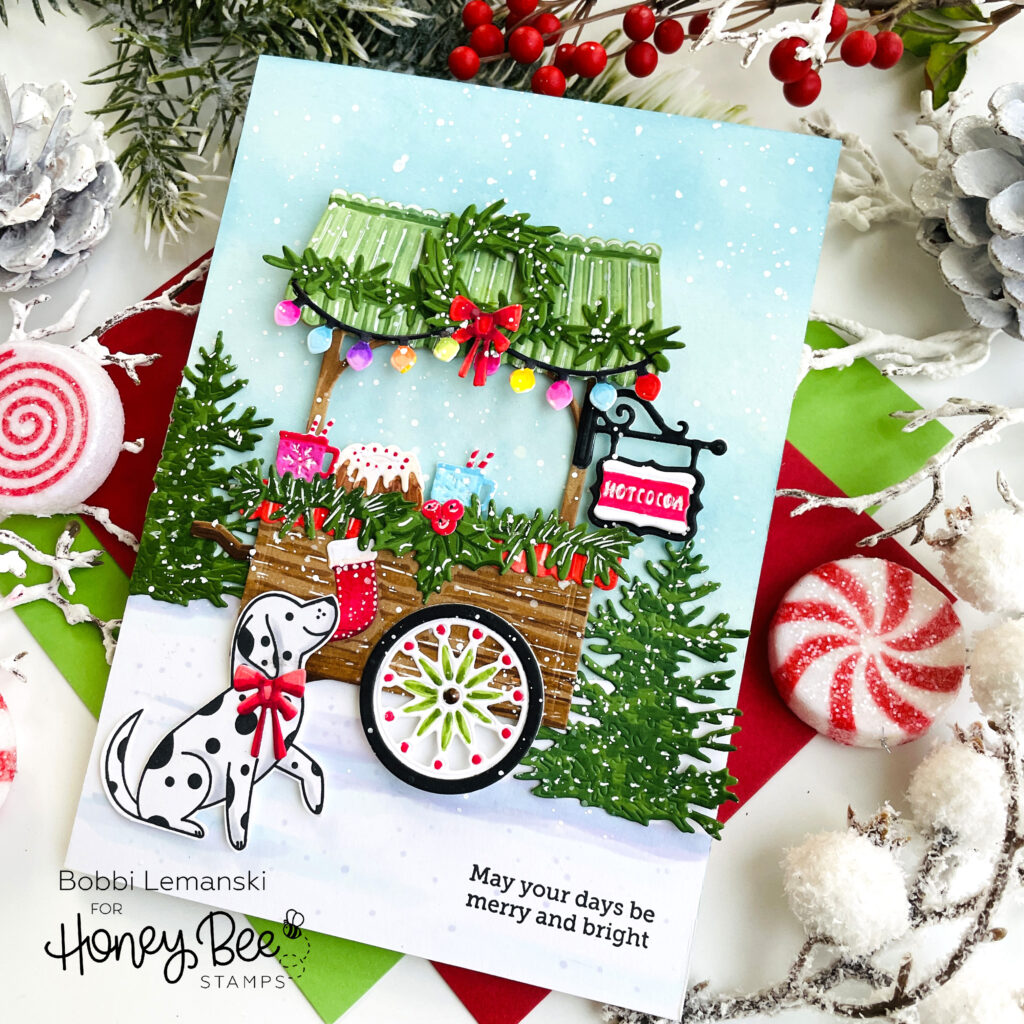
Hello Bee friends. It’s Bobbi Lemanski with a cart full of merry and bright. Just ask this cute pup who can smell the fresh baked goods! He seems to have his eye on a holiday treat! Pick up a slice of Bundt cake, have a cup of hot cocoa, and enjoy the snow falling as you swirl your drink with a peppermint stick. It’s Christmas time!
I’m using the following Honey Bee Stamps products:
Christmas Market Card Add-On Honey Cuts dies
Market Cart Builder Honey Cuts dies
Puppy Dog Tails stamp set and coordinating Honey Cuts dies (SALE: These coordinating sets are retiring and are marked down! Get them before they are gone!)
SALE ALERT: All Weekend Long (12/8-12/10)- Save an Additional 20% Off all Clearance and Retiring! Coupon Code: TWENTYOFF. The sweet Puppy Dog Tails stamp set and coordinating Honey Cuts dies is a retiring set and may qualify for this additional mark-down! Hurry because Sunday, 12/10 is the last day for the sale!
The featured project below is made from Neenah 80lb Solar White cardstock for the card base. All of the black ink stamping was done using Honey Bee’s Bee Creative Intense Black Ink. I use Honey Bee Stamps Bee Creative Precision Glue to adhere my elements together. I use Bee Creative Foam Dots With Tab for attaching my elements when I want them to stand out more. My card is 5″ X 7″ in size.
To create this 5″ X 7″ card, I cut the base elements of the cart using the Market Cart Builder Honey Cuts dies the holiday accessories using the Christmas Market Card Add-On Honey Cuts dies. I cut the elements from kraft (cart base), green (wreath, garland), black (tire and metal sign) and white cardstock (for everything else). I colored the accessories such as the string of lights, cocoa, Bundt cake and hot cocoa sign using Copic Markers.

To create the scene setting, I used Ranger Distress Oxide Ink in Tumbled Glass on a light aqua blue cardstock. Using my blending brush, I used a light and random touch to create a cloudy sky background. I added a snowy landscape at the bottom, by simply hand cutting soft curves from white cardstock. I attached the cart to the snowy ground using Bee Creative Foam Dots With Tab to make it stand out from the background. I added two evergreen trees on both sides of the cart. I glued them in place.

I stamped, cut, and added a sweet pup to the foreground using a foam tab. The dog is from the Puppy Dog Tails stamp set and coordinating Honey Cuts dies. I added shading below the dog, cart and the evergreens to “ground” them to the setting. I like to use a combination of blue and blue-violet Copics in BV000, BV00 and B000 for a soft and light, day shadow on the snow. I stamped the sentiment from the Heart Be Light stamp set in the bottom right corner. Finally, I splattered white paint using a fan-brush shaped watercolor brush over the entire scene for snowfall. I used Dr. PH Marten’s white ink for the snow.
You can shop the entire Honey Bee Stamps Holiday Wishes Release here. If you decide to place an order, please use the links in this post so that Honey Bee knows which ideas inspired you!
Thanks for stopping by today. If you want to see more ideas and inspiration from me, subscribe to my blog, BobbiHartDesign.com. I’ll send you updates on new posts! You can also find me on Instagram as @BobbiHartDesign and on Facebook as BobbiHartDesign.
