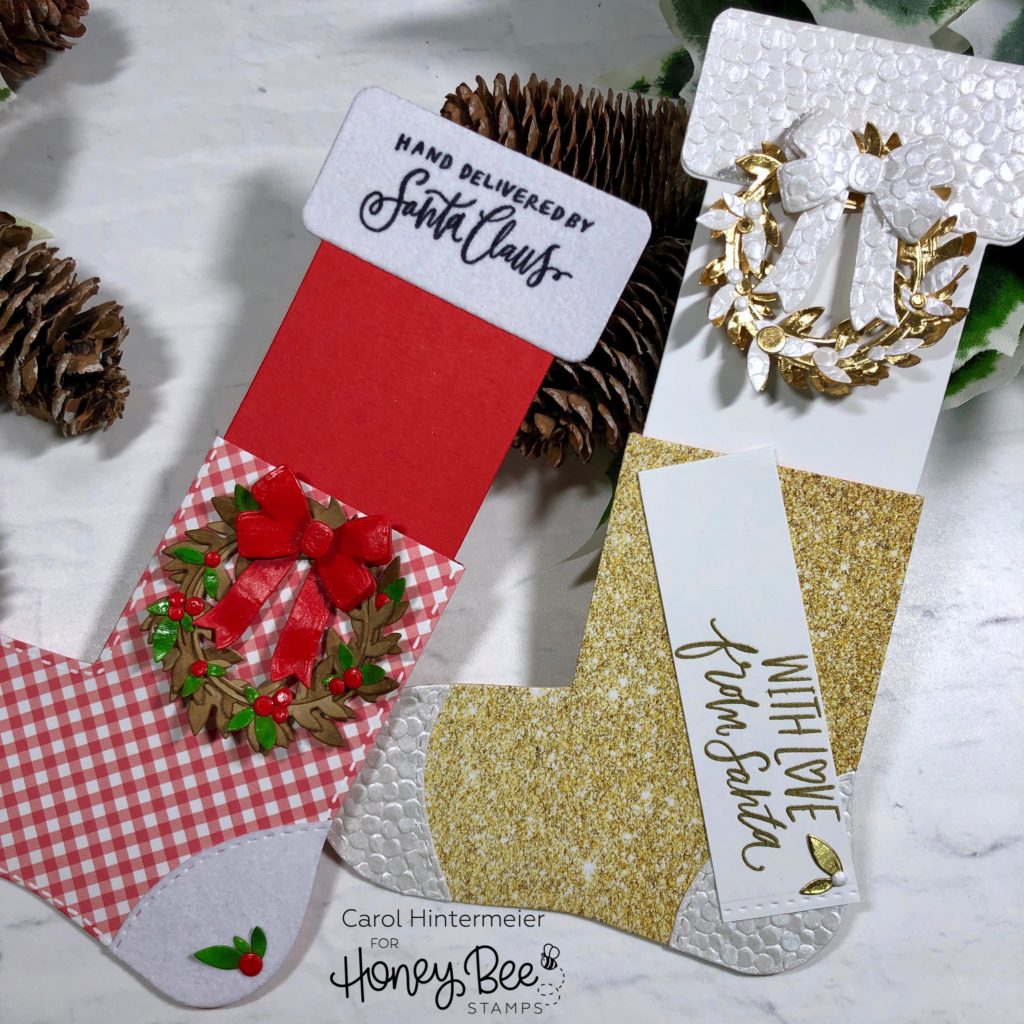
Hello Honey Bee friends! I’m still having so much fun using the awesome new products from the Season to Sparkle release! Today, I have two projects using the Stocking Gift Card Holder Honey Cuts. I’ve made two, one a little more rustic, and another a little more elegant!
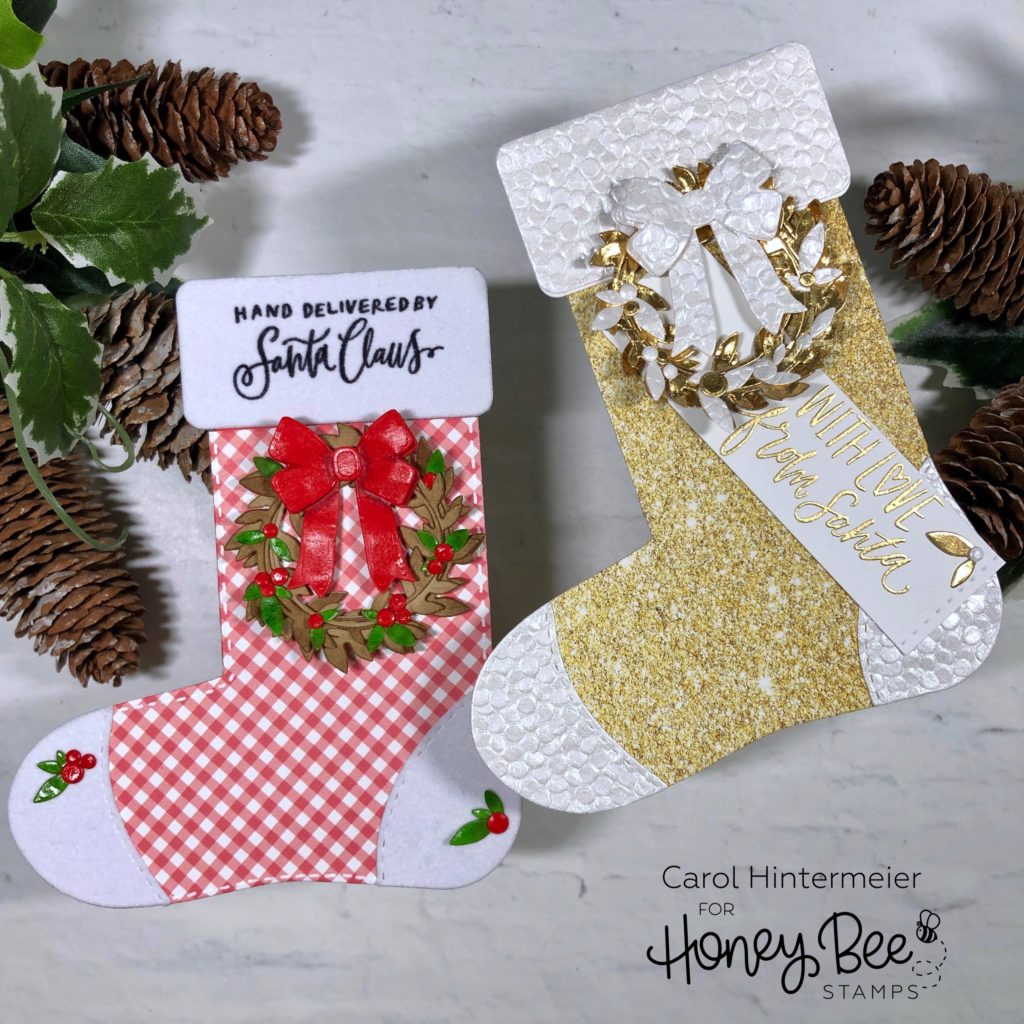
For the rustic one, I used some red gingham from the Holiday Traditions 6×6 paper pad. I used Therm O Web’s Winter Latte Flocking Sheet for the stocking topper, toe, and heel. You can die cut with these sheets just like a piece of paper. My sentiments are from the Santa Express set, and I was very happy to find that you can stamp directly onto the flocked piece. I used my MISTI and some black dye ink and stamped it twice.
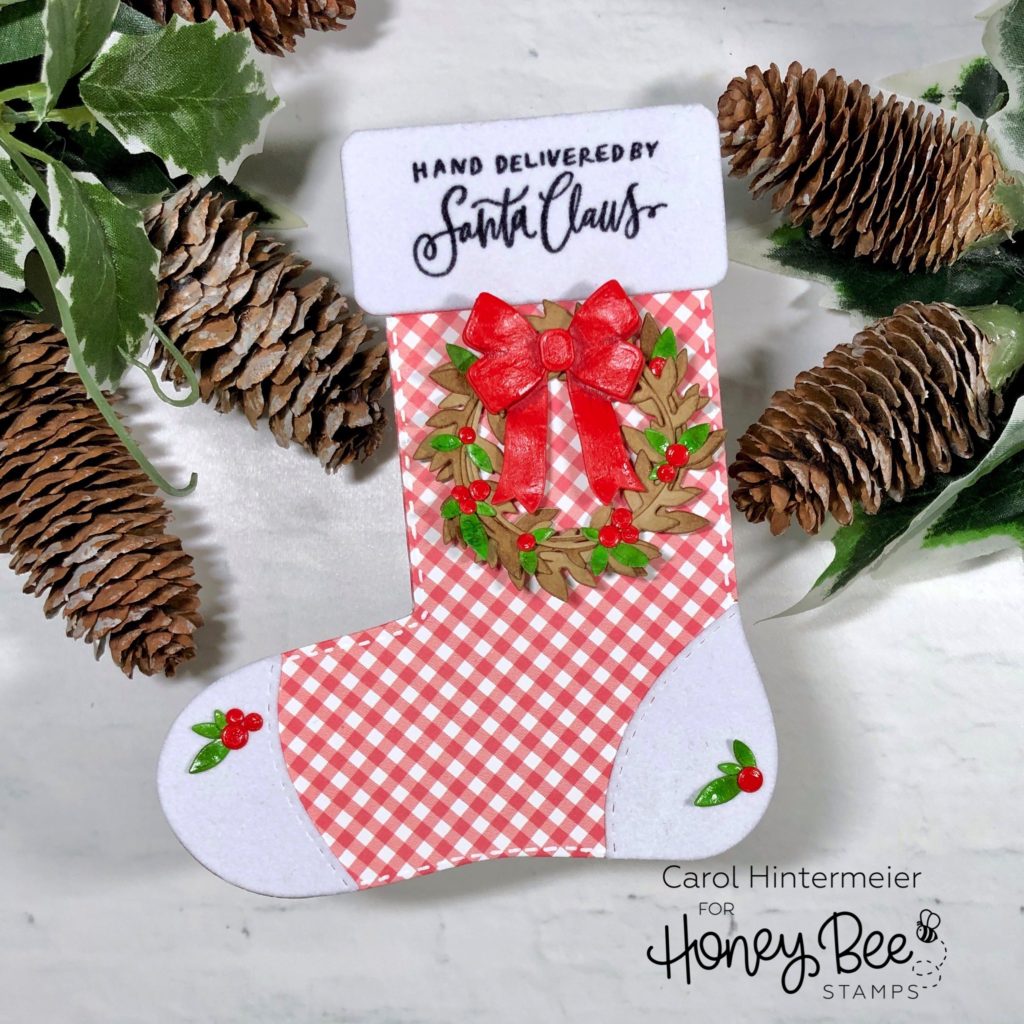
For the stocking portion, you will need to die cut two of the stockings. For the second cut, be sure to cut it on the opposite side of the paper–in other words, put the die on the back side of the patterned paper for the second one. This way you’ll have the same pattern showing on the front and back. Fold in the tabs and adhere the two pieces together for the stocking. Be sure to put your line of glue just along the side and bottom edges so the insert will fit in. Here’s a photo showing the tabs folded to the inside.

For the wreath on this stocking, I used the Joy Noel Wreath Honey Cuts. I cut the wreath twice from Neenah Desert Storm card stock. I used a Detail Blender Brush to add some Gathered Twigs Distress Ink to the edges. I intertwined them and added a couple drops of glue to hold them together. I die cut the leaves, berries, and bow from red card tock. I used a ball stylus that is from the Flower Shaping Essentials Kit to shape them. I used Ranger Distress Collage Medium Matte to adhere everything in place. The Honey Bee Die Release Tool is very handy here too!
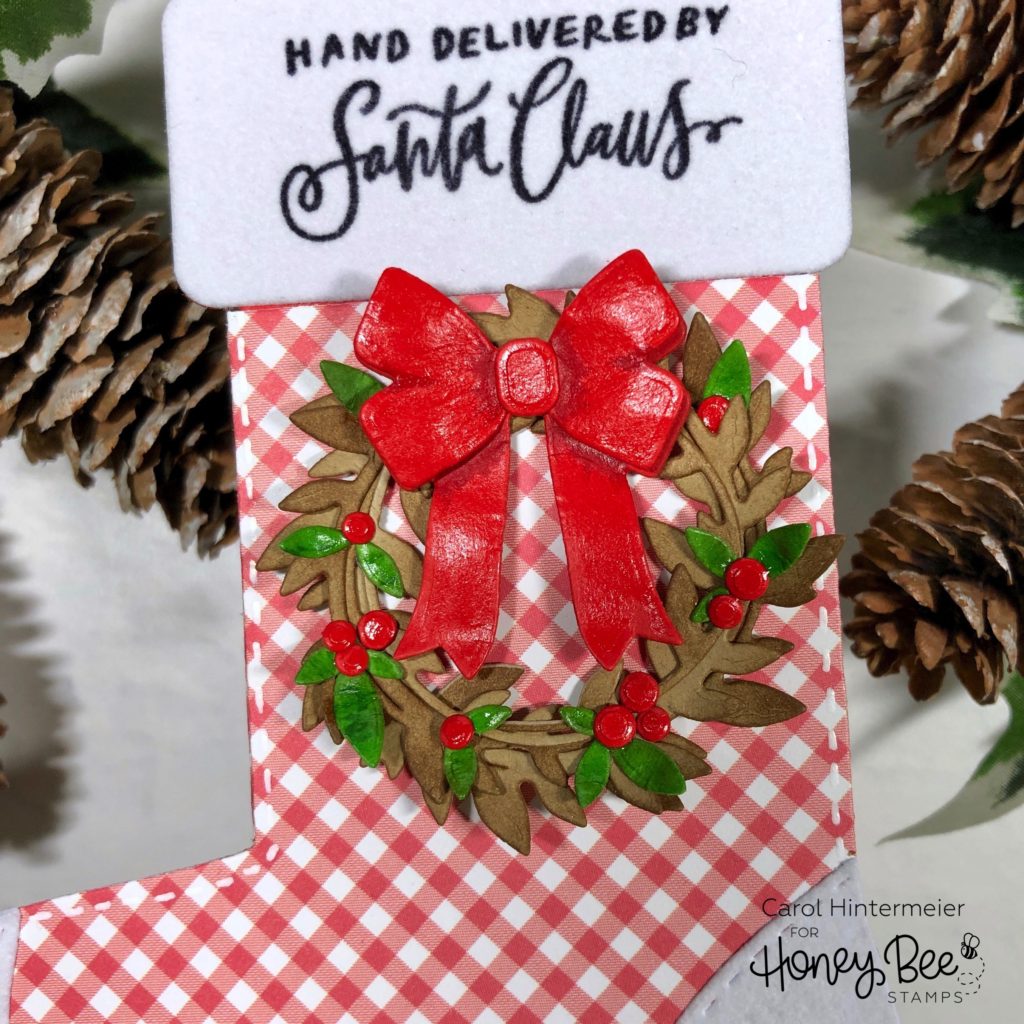
One of my favorite things to do with die cuts like this is to put a thin glaze over them. The glaze helps to hold the shape and also makes them pop! I like to use JudiKins Diamond Glaze for this technique (this is very similar to Glossy Accents, but I haven’t tried it with this.) I poured out a tiny bit of glaze and added a few drops of water to thin it. I used a paint brush to apply a thin coat and let it dry.


For a little extra embellishment, I added stitched lines with a white gel pen and more leaves and berries on the heel.

Next up is the “elegant” stocking. The main part of the stocking is also die cut from a sheet of paper from the Holiday Traditions paper pack. For the other pieces, I used a special paper from Tonic Studios called Snowdrop Meadows (this is available in the Honey Bee shop–click the link to go). I was quite pleased to see that even after die cutting, the texture and dimension of this paper remained!
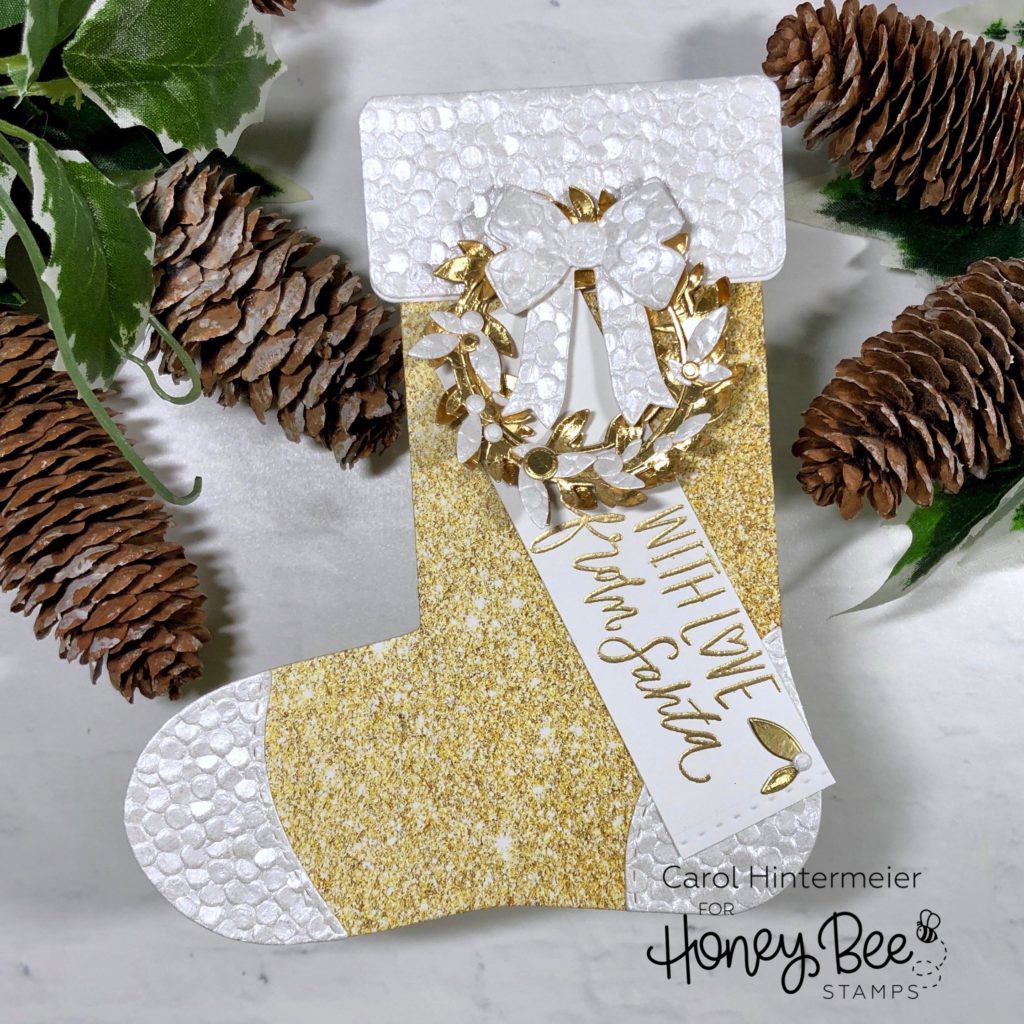
For this wreath I used some metallic gold paper. Before I die cut the bow from the specialty paper I adhered a small off of Neenah 80# paper to the back of the specialty paper. This paper doesn’t have a lot of heft to it, so by adding the backing to it, I can shape the bow.
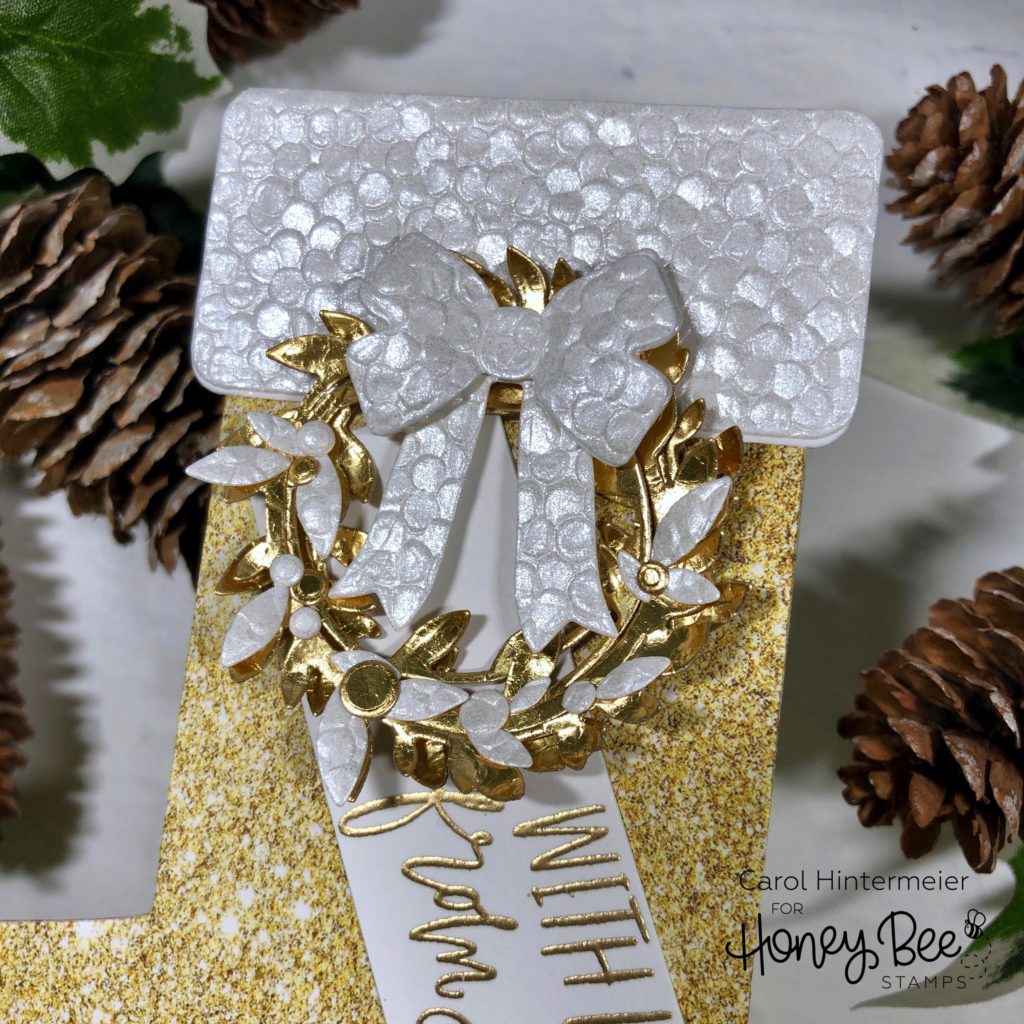
For this sentiment, also from the Santa Express set, I stamped it with Versamark and heat embossed it with WOW! Metallic Gold Rich embossing powder. I trimmed it down with my paper trimmer. I used one of the little edge dies from the Banner Builder Honey Cuts to add the stitching on the end.
I think it’s amazing how this patterned paper looks like REAL glitter paper! I’ve used so much of the Holiday Traditions paper pad, I’m going to need to order more soon!

Here’s a photo showing the inserts slid out. These inserts are the perfect size to hold a gift card. Of course, you can just stamp or handwrite a sentiment instead.
So….are you team rustic, or team elegant? LOL! I’m definitely both! Thank you so much for stopping by! I hope you have a wonderful, crafty day! Hugs–Carol